

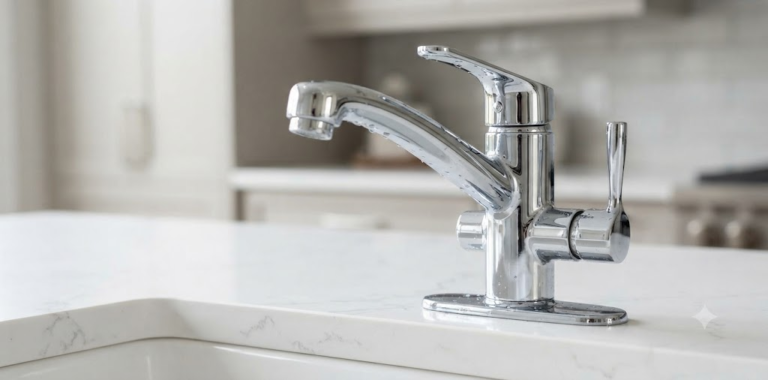
It is late at night, the house is completely quiet, and then you hear it: drip… drip… drip. That steady rhythm coming from the kitchen or bathroom sink is not just an annoying sound keeping you awake; it is literally money washing down the drain. A faucet leaking just one drip per second can waste over 3,000 gallons of water a year—enough to fill more than 180 showers.
If you are dealing with how to fix a leaky faucet, you are probably wondering whether you need to call an expensive plumber or if this is something you can tackle yourself with a basic set of tools.
Over my years working around residential renovation projects and managing property maintenance, I have fixed hundreds of leaky fixtures. The good news is that most residential faucets can be repaired in under an hour without calling in professional help. Let’s look at how you can diagnose the problem, find the right parts, and stop that annoying leak once and for all.
Quick Answer: How to Fix a Leaky Faucet Fast
If you are short on time, here is the short version of the repair process:
- Shut off the water supply valves under the sink.
- Plug the drain so you do not lose any tiny screws or parts down the pipe.
- Remove the handle by finding the hidden set screw (often under a decorative cap) and lifting it off.
- Access the valve mechanism (cartridge, washer, or ball assembly) by removing the retaining nut.
- Inspect and replace worn-out rubber O-rings, washers, or the entire cartridge.
- Reassemble the fixture, turn the water back on, and check for leaks.
Understanding Your Faucet Type
Before you grab your wrench, you need to know what kind of setup you are dealing with. Not all faucets are built the same way, and buying the wrong replacement parts will bring your project to a halt.
1. Compression Faucets
These are the traditional style with separate hot and cold handles. They rely on a rubber washer pressed against a valve seat to stop the water flow. If a compression faucet drips, the rubber washer is almost always worn out and needs to be replaced.
2. Cartridge Faucets
Common in modern single-handle sinks, cartridge faucets use a movable stem (the cartridge) to control water temperature and volume. When these leak, the internal plastic or brass cartridge has usually failed, and replacing the whole cartridge is much easier than trying to repair individual components.
3. Ball Faucets
Found frequently in older single-handle kitchen sinks, these use a metal or plastic ball inside the pivoting cap. They contain multiple small springs, cam washers, and O-rings that can degrade over time.
4. Ceramic Disk Faucets
These premium, modern fixtures use two ceramic disks that slide against each other to regulate water flow. They are exceptionally durable, but if grit or mineral scale gets trapped between the disks, they will leak.
Tools and Materials Needed for the Job
You do not need an industrial-grade toolbox for this project. Head to your garage or local hardware store and gather the following items:
- Adjustable wrench or tongue-and-groove pliers (wrap tape around the jaws to protect chrome finishes)
- Hex wrench (Allen wrench) set for handle set screws
- Flathead and Phillips screwdrivers
- Replacement parts (matching O-rings, washers, or a replacement cartridge)
- Plumber’s grease (silicone-based)
- An old toothbrush and white vinegar (for cleaning mineral scale)
- A clean towel or rag
Step-by-Step Guide: How to Fix a Leaky Faucet
Follow these steps carefully to ensure a leak-free result without damaging your plumbing fixtures.
Step 1: Shut Off the Water Supply
Never skip this step. Look under the sink cabinet and locate the hot and cold water shut-off valves. Turn them clockwise until they are completely tight. If your sink does not have dedicated shut-off valves underneath, you will need to shut off the main water supply valve to your house.
Pro Tip: Once the water is off, turn the faucet handle on to relieve any remaining pressure and drain out the standing water in the lines.
Step 2: Block the Drain and Remove the Handle
Pop the sink stopper down or place a thick washcloth over the drain opening. This simple habit saves you from a heart-stopping moment when a tiny set screw bounces off the porcelain and disappears down the plumbing trap.
Locate the decorative cap on the faucet handle, pop it off with a flathead screwdriver or fingernail, and loosen the hidden set screw inside using an Allen wrench. Lift the handle straight up. If it feels stuck due to mineral buildup, gently wiggle it or apply a few drops of penetrating oil.
Step 3: Expose and Inspect the Inner Assembly
With the handle removed, you will see the retaining nut or cap protecting the internal valve. Unscrew this counterclockwise using your adjustable wrench. Pull out the internal mechanism—whether it is a rubber washer assembly, a ball mechanism, or a plastic cartridge.
Inspect every surface closely. Look for:
- Flattened, torn, or brittle rubber washers.
- Cracks in plastic cartridges.
- Crusty white mineral deposits (limescale) built up around the seals.
Step 4: Clean Mineral Buildup
Hard water leaves behind calcium and lime deposits that prevent tight seals. Submerge removable parts in a small container of equal parts warm water and white vinegar for 15 minutes. Scrub away any stubborn residue with an old toothbrush.
Step 5: Replace Worn Parts and Lubricate
If you are working on a compression faucet, swap out the old rubber washer at the base of the stem. If you are dealing with a cartridge faucet, take the old cartridge to the hardware store to match it up precisely with an identical replacement.
Before putting everything back together, coat any new rubber O-rings and seals with a thin layer of plumber’s grease. Never use petroleum jelly (like Vaseline), as it degrades rubber over time.
Step 6: Reassemble and Test
Put the components back together in the exact reverse order of how you took them apart. Hand-tighten the retaining nut, reinstall the handle, and secure the set screw.
Before turning the water back on, make sure the faucet handle is in the closed position. Slowly open the hot and cold supply valves underneath the sink, listening for the sound of water filling the lines. Turn on the faucet to flush out any trapped air, then turn it off and inspect underneath and around the base for any signs of seepage.
Cost Breakdown: DIY vs. Calling a Professional
Fixing a leak yourself is one of the most cost-effective home maintenance projects you can take on.
- DIY Repair Cost: $5 to $25. You are only paying for replacement washers, a new cartridge, or a tube of plumber’s grease.
- Professional Plumber Cost: $150 to $350. Plumbers typically charge a standard service call fee plus hourly labor rates, even for quick 30-minute fixes.
If you want to dive deeper into broader property updates or check out specialized guides, you can explore resources like IngeBIM for more practical home improvement strategies.
Common Mistakes to Avoid
Even simple plumbing projects can go sideways if you rush through them. Keep these common pitfalls in mind:
- Forgetting to shut off the water: Turning the handle without shutting off the supply first is a classic recipe for an unexpected indoor flood.
- Over-tightening nuts: Cracking a porcelain sink or stripping brass threads with an oversized wrench turns a cheap fix into an expensive plumbing replacement.
- Using the wrong replacement part: Cartridges look remarkably similar, but a millimeter difference in stem length will cause ongoing leaks or handle misalignment. Always bring the old part to the store with you.
Maintenance Tips to Prevent Future Leaks
An ounce of prevention goes a long way in plumbing. Protect your fixtures with these simple habits:
- Clean aerators annually: Unscrew the tip of your faucet once a year and clean out trapped debris and mineral scale to maintain smooth water pressure.
- Avoid slamming handles: Forceful handling stresses internal valve seats and degrades rubber seals prematurely.
- Flush lines after major plumbing work: If your municipal water supplier or main home line was shut off, debris can dislodge and travel into your sink fixtures, scoring the internal ceramic disks or rubber washers.
Frequently Asked Questions
1. How do I know which replacement part to buy?
The safest method is to turn off the water, disassemble the faucet, and pull out the worn cartridge or washer. Take it directly to a local hardware store plumbing counter to match it side-by-side with a replacement.
2. What causes a faucet to leak from the base instead of the spout?
A leak around the base of the spout is usually caused by worn-out O-rings located inside the swivel spout or base assembly. Replacing these small rubber rings stops the water from escaping outward.
3. Can hard water ruin a new faucet quickly?
Yes. High mineral content (calcium and magnesium) builds up on internal seals and scratches ceramic disks over time. Installing a whole-home water softener or regularly cleaning your aerator extends the lifespan of your fixtures.
4. Why is my faucet still dripping after I replaced the washer?
If a new washer does not stop the drip in a compression faucet, the metal valve seat inside the fixture has likely become pitted or corroded. You may need a valve seat dressing tool to smooth it out or replace the entire fixture.
5. Is it ever better to replace the whole faucet instead of repairing it?
If your fixture is more than 15 years old, heavily corroded, or requires expensive proprietary replacement parts, putting that money toward a modern, water-efficient replacement is often a better long-term investment.
6. Do I need plumber’s tape (Teflon tape) to fix a leaky faucet?
Plumber’s tape is typically used on threaded pipe connections behind the wall or below the sink (like supply lines). It is rarely needed on internal cartridge assemblies, which rely on rubber O-rings for waterproof seals.
Conclusion
A leaky faucet is a minor nuisance that can quickly turn into a major headache if ignored. By understanding your fixture type, gathering the right replacement parts, and taking your time with the disassembly process, you can solve this problem in less than an hour. Not only will you save money on your water bill and avoid expensive plumbing fees, but you will also gain the satisfaction of handling your own home maintenance. Take a look under your sink this weekend, grab your wrench, and put an end to that drip once and for all.
