

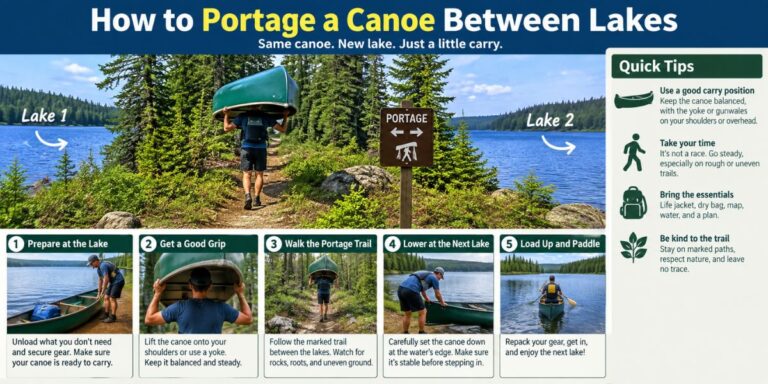
Portaging just means carrying your canoe and gear overland between two bodies of water — a normal part of any real backcountry canoe trip, and one that gets a lot easier once you’ve got the technique down. Here’s how to actually do it safely and without wrecking your back or your boat.
Step 1: Unload and Prep Before You Even Lift
Before touching the canoe onto your shoulders, get the boat and gear sorted properly.
Get out carefully. Bring the canoe into shallow water and step out into the water itself rather than onto rocks — this “wet-foot” approach protects the hull from scraping against rocks or getting stuck in mud. Unload your gear before the boat has a chance to make contact with anything that could damage it.
Pack smart. If you’re carrying two packs, stack the second one on top of the first on your back rather than trying to front-carry a pack, which throws off your balance and blocks your view of the trail. Keep loose items packed inside your larger bags instead of clipped loosely to the thwarts, where they can snag on branches or fall off mid-carry.
Scout the trail if it’s long or unfamiliar. Walking it once without the canoe first lets you spot obstacles, tricky footing, or narrow spots before you’re committed to carrying a boat through them.
Step 2: Get the Canoe Onto Your Shoulders
How you lift depends on whether you’re doing it solo or with a partner, and how heavy the canoe is.
Two-person lift (better for heavier boats):
- Each person stands near the bow or stern, on opposite sides, roughly an arm’s length from the center yoke.
- Grab the opposite gunwales, flip the canoe overhead together, and slide it backward until it settles under the yoke.
- Balance the weight across your shoulders and extend your arms forward — a “Superman” position — which helps with both balance and handling wind while walking.
Solo lift (the one-up method):
- Roll the canoe onto its side with the hull resting against your thighs or knees.
- Grab the near gunwale and rock the boat back and forth a few times to build momentum.
- Pop the canoe up onto your thighs in a “table” position, shift your hands to the yoke or gunwales, and roll it smoothly onto your shoulders in one continuous motion.
The solo lift takes some practice to get smooth, so it’s worth trying it a few times on land or in shallow water before doing it for real with a loaded trip ahead of you.
Step 3: Walk the Trail
Once the canoe’s up and balanced, walking it is mostly about pacing and awareness:
- Use your paddle like a hiking stick, blade pointed up, for extra stability on uneven ground.
- Yield to uphill traffic. If you’re heading downhill and meet someone coming up, they get the right-of-way — it’s much harder to stop and restart a climb while carrying a canoe.
- Drop one arm occasionally to shift the weight distribution and give your shoulders brief relief without having to fully set the canoe down.
Step 4: Launch at the Next Lake
Getting back on the water needs the same care as getting off it did.
- Check for underwater hazards or sudden drop-offs before stepping in, especially if you can’t see the bottom clearly.
- Lower the stern into the water first, or place the canoe straight into deep enough water that the hull won’t scrape or catch on anything below the surface.
- Load gear and get everyone back in with a clear order — lookout first, navigator second, and the person steering (the “captain”) boards last, once everyone else and the gear are settled.
